

Losing your teeth is stressful enough without adding the hassle of multiple dentist appointments, crowded waiting rooms, and outrageous bills. If you’re looking for a more convenient way to restore your smile, you’ve probably considered handling the process right from your living room. It’s truly a game-changer for people with busy schedules. Ordering online dentures saves you significant time and money, but many people worry about how the final product will actually fit without a dentist hovering over the chair. You might wonder if you’ll end up with a set that slips, slides, or causes painful sore spots on your gums.
The good news is that getting a snug, comfortable fit from a remote dental lab is entirely possible. It just requires a little bit of patience and attention to detail during the initial molding process. Since you’re essentially acting as your own dental assistant, your precision dictates the outcome. Here are some practical tips to ensure your new teeth feel just as good as they look.
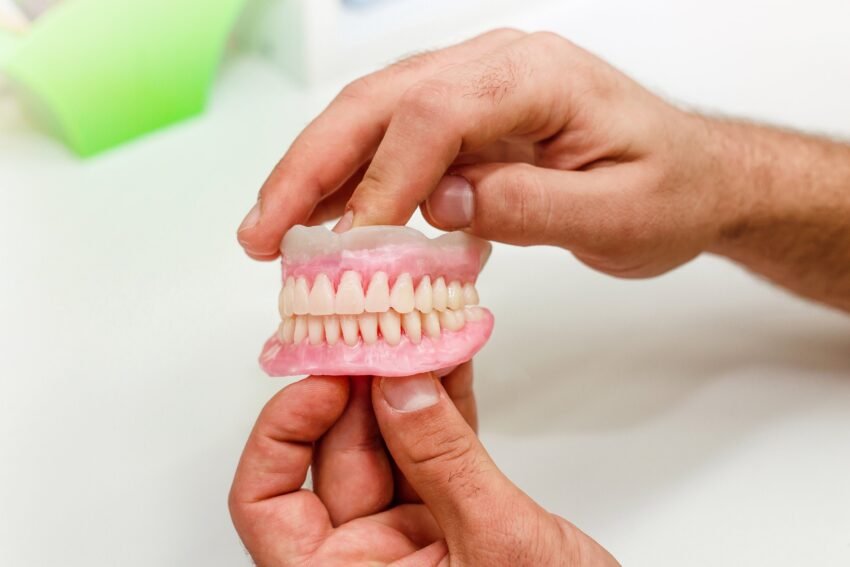
Master the Impression Process
The mold you create at home is the blueprint for your new smile. If that blueprint is flawed, the final product won’t fit your mouth correctly. When your impression kit arrives in the mail, don’t rush straight into mixing the putty. Sit down at your kitchen table and read the instruction manual twice. Watch any tutorial videos the company provides. You need to understand the timing because the dental putty sets up very quickly once the two components are mixed. Gather a mirror, a timer, and some paper towels so everything is within arm’s reach before you begin.
Execute the Mold Perfectly
When it’s time to take the impression, the goal is to capture the deepest parts of your gum line without distorting the shape. Keep these three techniques in mind:
- Mix thoroughly and quickly: Knead the putty until it’s a solid, uniform color without any streaks, roll it into a log, and place it evenly into the plastic tray.
- Use steady pressure: When you press the tray into your mouth, apply steady, even pressure. Don’t bite down too hard. If you push the tray all the way through the putty until your gums touch the hard plastic, the impression will be inaccurate and the resulting acrylic will hurt.
- Capture the ridges: Once the tray is seated, use your fingers to pull your lips and cheeks up and over the edges of the putty. This captures the exact shape of your gum ridges, ensuring your final set has a proper suction seal.
Share Details and Photos
Dental technicians are incredibly skilled, but they can’t see your face; they rely entirely on the information you provide in the box. Take advantage of modern technology and send them a few clear photos of your face. Snap a picture of yourself smiling naturally, and another with a neutral expression. If you’re ordering a partial set, make sure the lab can clearly see the shade and shape of your remaining natural teeth. If you’ve worn a set in the past and always struggled with a specific sore spot or an awkward bite, write that down. Sending detailed notes along with your impressions gives the lab technicians the context they need to craft a comfortable, personalized appliance that complements your unique facial structure.
Take the Try-In Seriously
Most reputable remote labs will send you a wax try-in before they manufacture the permanent acrylic set. This is your test run, and it’s the most critical step for achieving a comfortable fit. Don’t just pop the wax set in, look in the mirror for three seconds, and send it back with an approval. Wear it around the house for a little while. Try talking out loud, reading a book, or sipping a glass of water. Pay close attention to how the mold sits against your gums. If it feels loose, pinches a specific spot, or forces your jaw into an unnatural position, you need to tell the lab immediately. This is the exact moment to make changes. It’s much easier for the technicians to adjust the warm wax than it is to grind down the finished hard acrylic later on.
Allow for an Adjustment Period
Even when the lab nails the design perfectly, your new set will feel foreign for the first few weeks. Your mouth is highly sensitive, and introducing a new appliance forces your cheek muscles, tongue, and gums to adapt. Don’t get discouraged if speaking feels a bit clunky or if you produce more saliva than usual during those first few days. This is a completely normal reaction. Start by eating soft foods like yogurt, scrambled eggs, or mashed potatoes. Slowly introduce chewier foods as your confidence grows. Cut your meals into tiny bites and try to chew evenly on both sides of your mouth to keep the appliance stabilized.
Address Minor Sore Spots
As your mouth adjusts and the appliance settles into your gum tissue, you might notice a few minor sore spots. This happens because the soft tissue is getting used to the pressure of chewing. Don’t endure the pain silently. Take the set out and rest your gums for a few hours. Rinse your mouth with warm salt water to soothe the irritation. If a specific spot continues to hurt after a week of consistent wear, reach out to the lab’s customer service team. They can usually provide an adjustment kit or guide you through a simple process to smooth out the area causing the discomfort.
Reclaiming Your Smile
Restoring your smile from home is an incredibly convenient and budget-friendly process. By taking your time with the impression putty, communicating openly with the lab technicians, and thoroughly testing the wax try-in, you take control of your own dental care. With a little bit of patience and practice, you’ll soon be speaking, eating, and laughing with total confidence.